Workflows
Zolvio is designed as a closed loop: detect → prove → fix → measure. This page shows the highest-leverage workflows that combine audits, issues, recordings, heatmaps, A/B tests, and surveys.
Workflow 1: Fix the #1 conversion blocker
- Run an audit to detect issues and prioritize by severity.
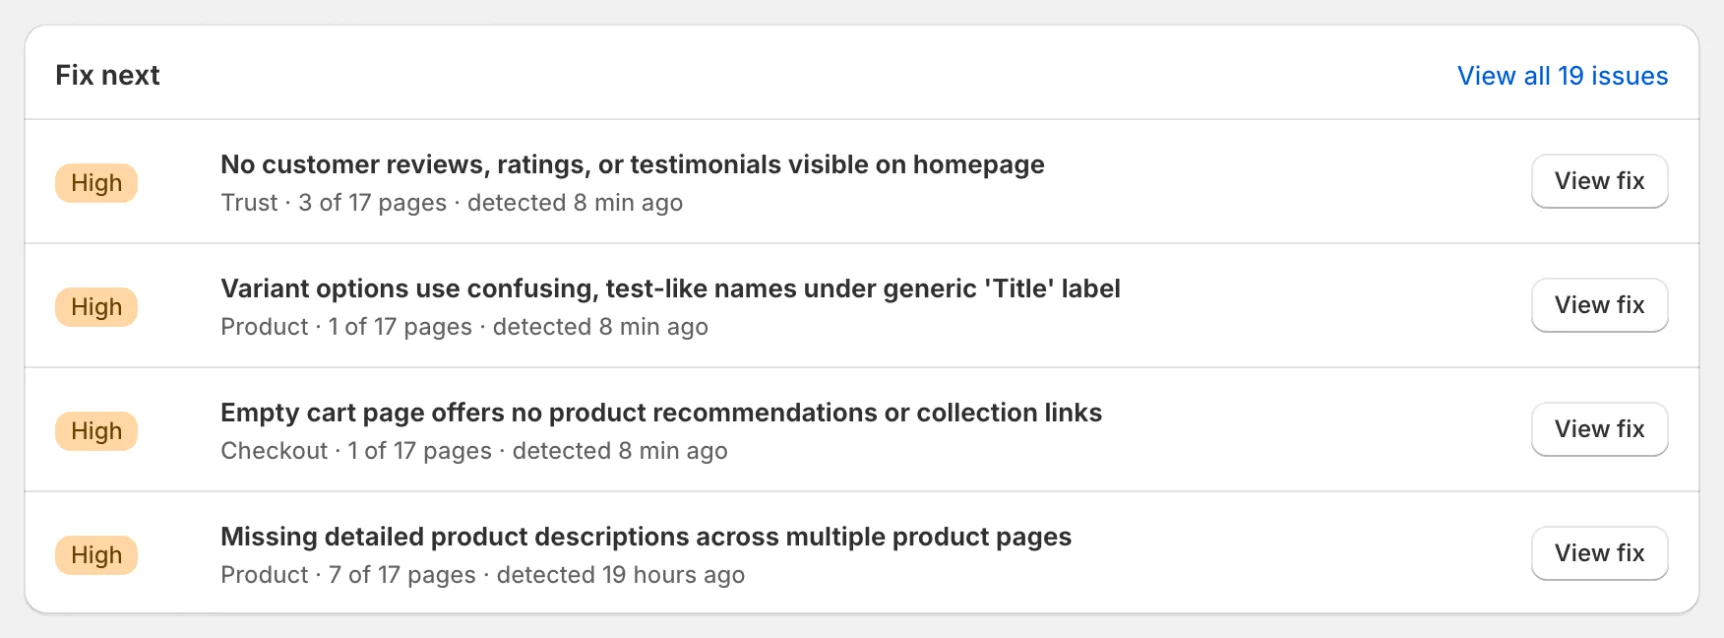
After an audit, Fix next on the dashboard lists the issues to work on first. - Open the top issue in Issues and review the evidence (affected pages, screenshots, and any available metrics).
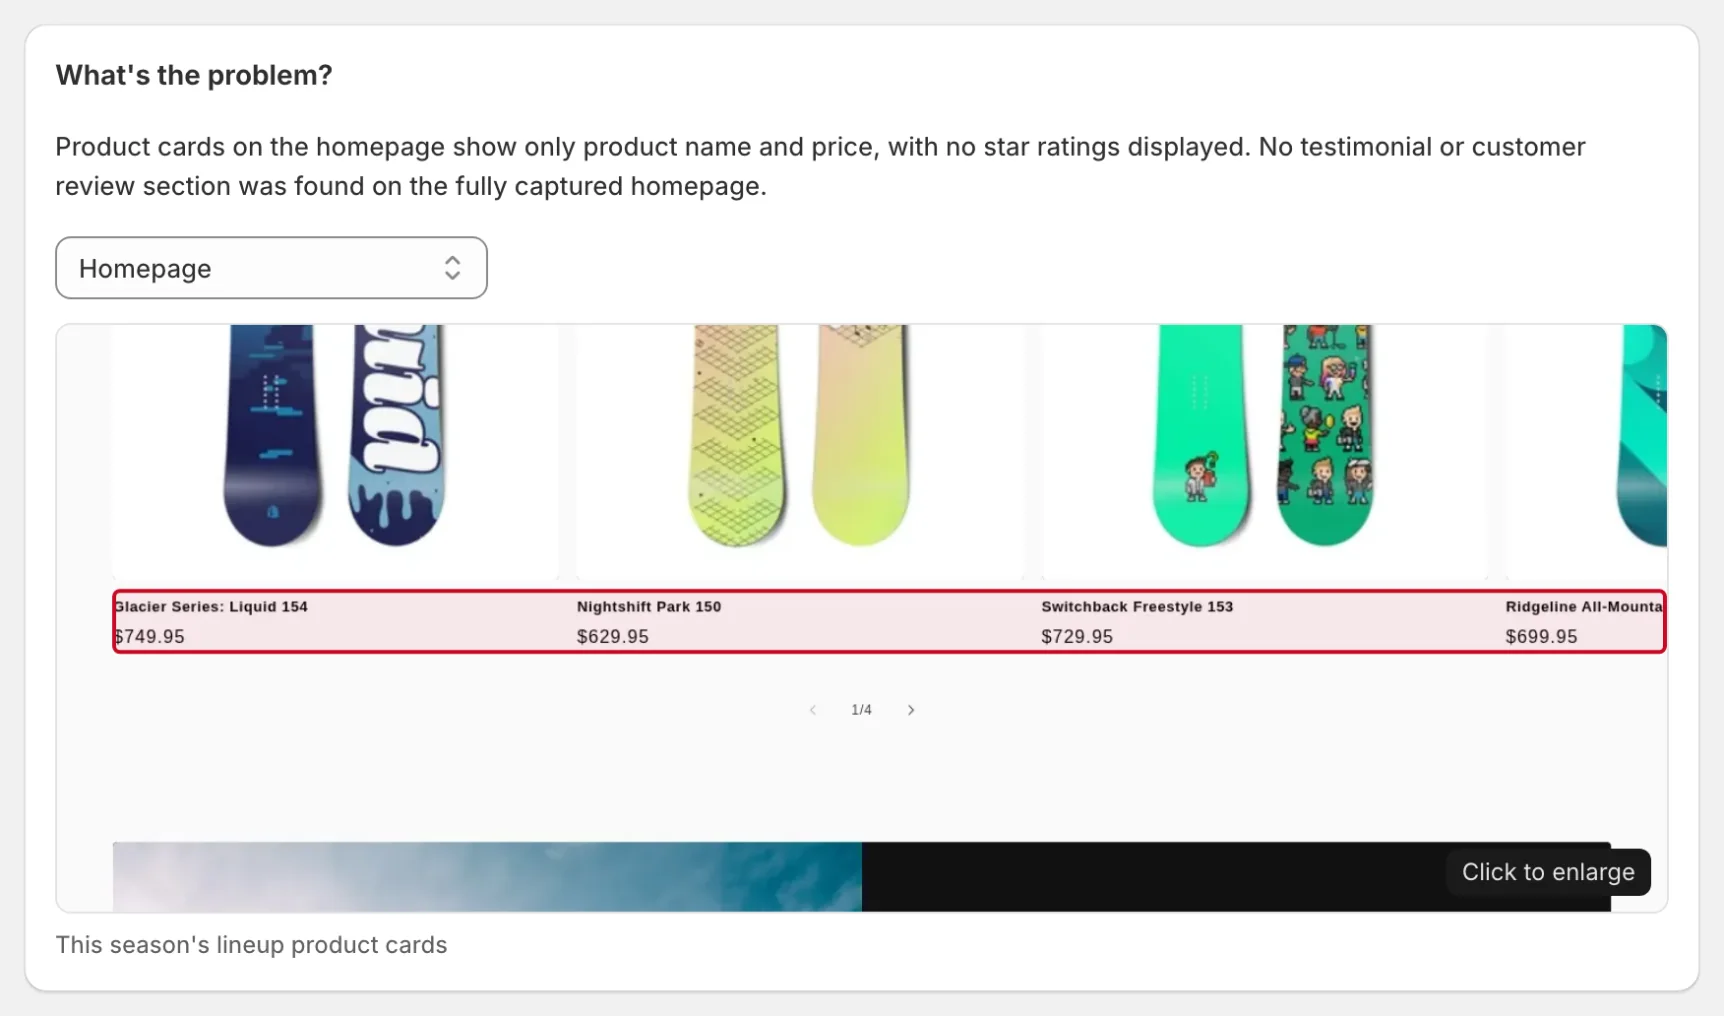
An issue's evidence: what the audit found, with the problem outlined on a screenshot of the page. - Use View heatmap and View recordings on the issue to confirm the real shopper friction behind it.
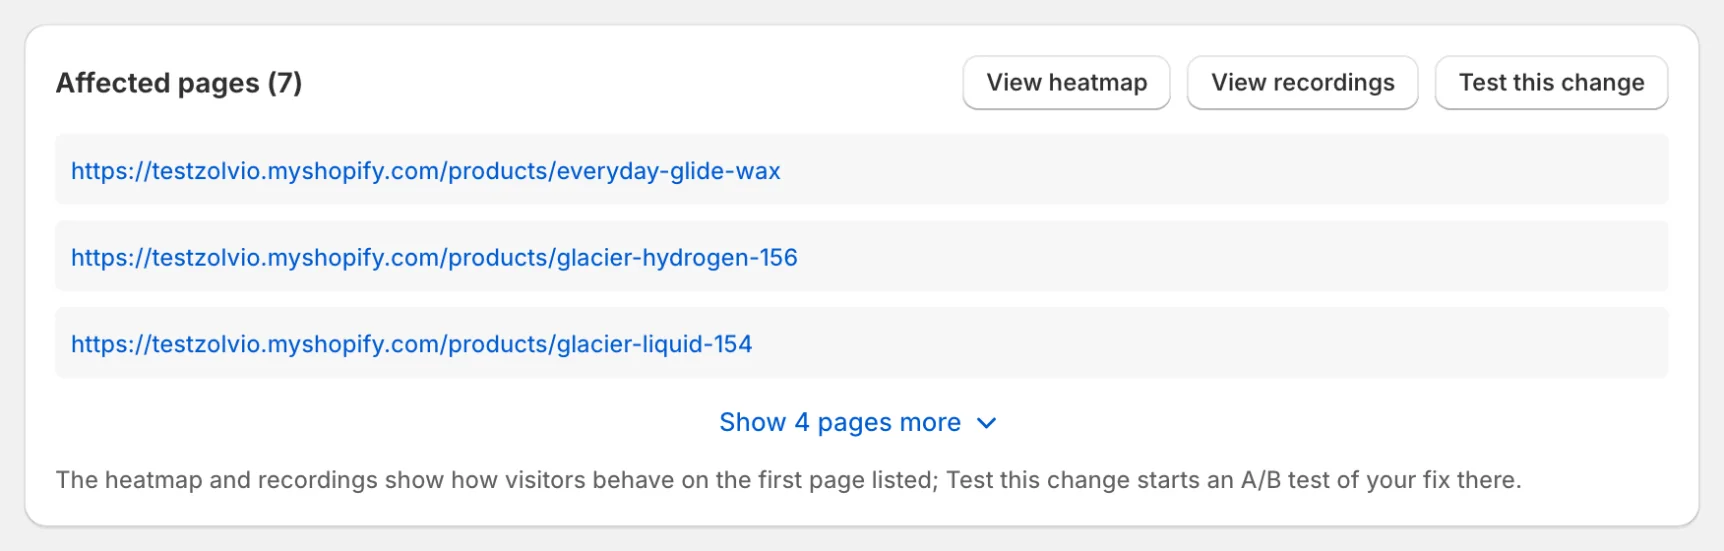
Affected pages, with View heatmap, View recordings and Test this change. - Follow the guided fix. Open <file> takes you to the exact file in your live theme’s code editor; duplicate your theme first if you want a restore point. Not sure the change will help? Click Test this change to A/B test it on that page first.
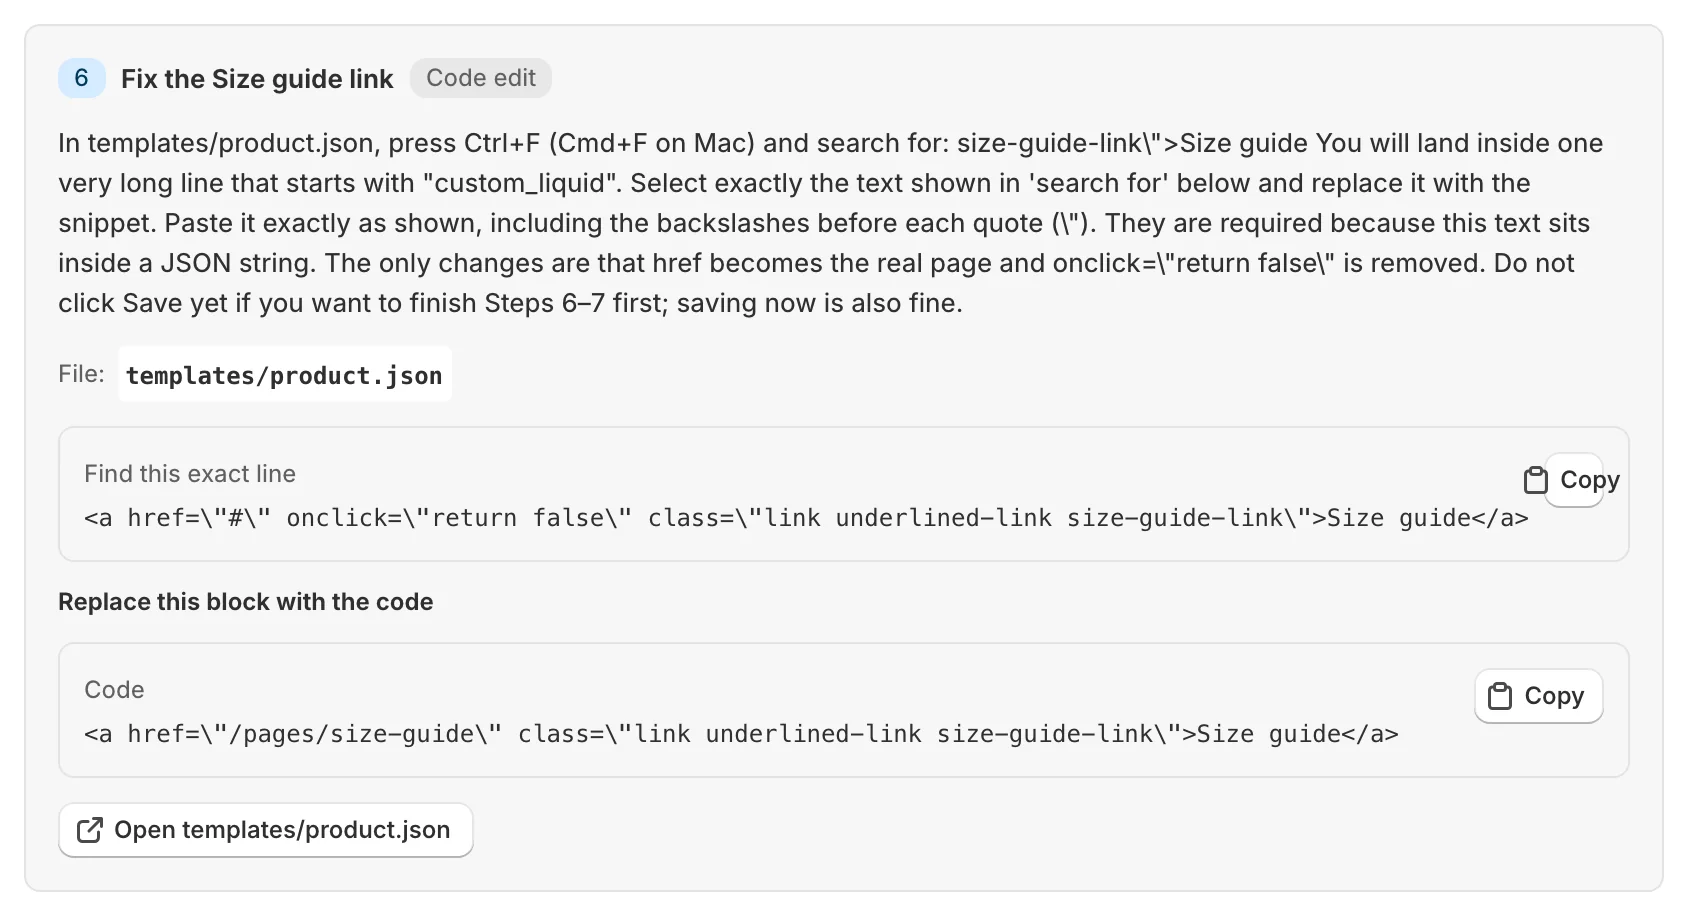
A code step: the file, the exact line to find, the code to put in its place, and a button that opens the file in your theme's code editor. - Click Verify fix. The next audit confirms the fix and updates your score.
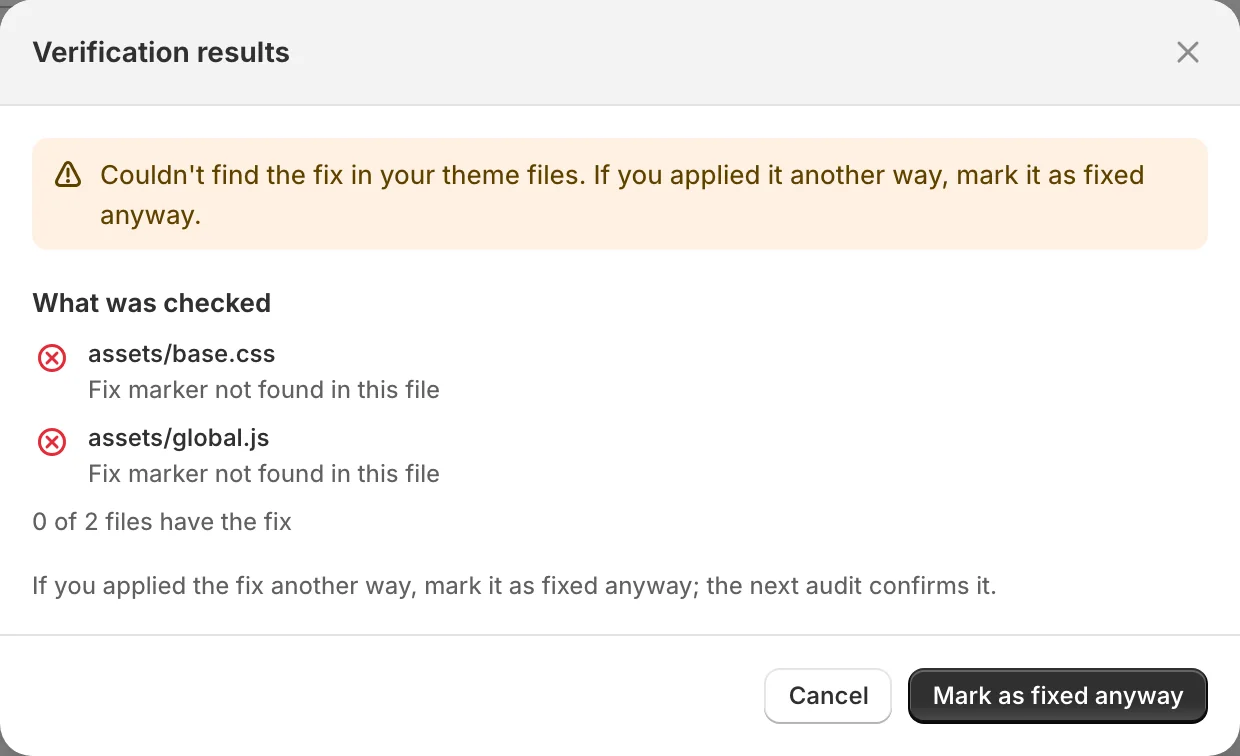
Verify fix reads your live theme's files. Here the change hasn't been pasted yet, so it lists the files it checked. 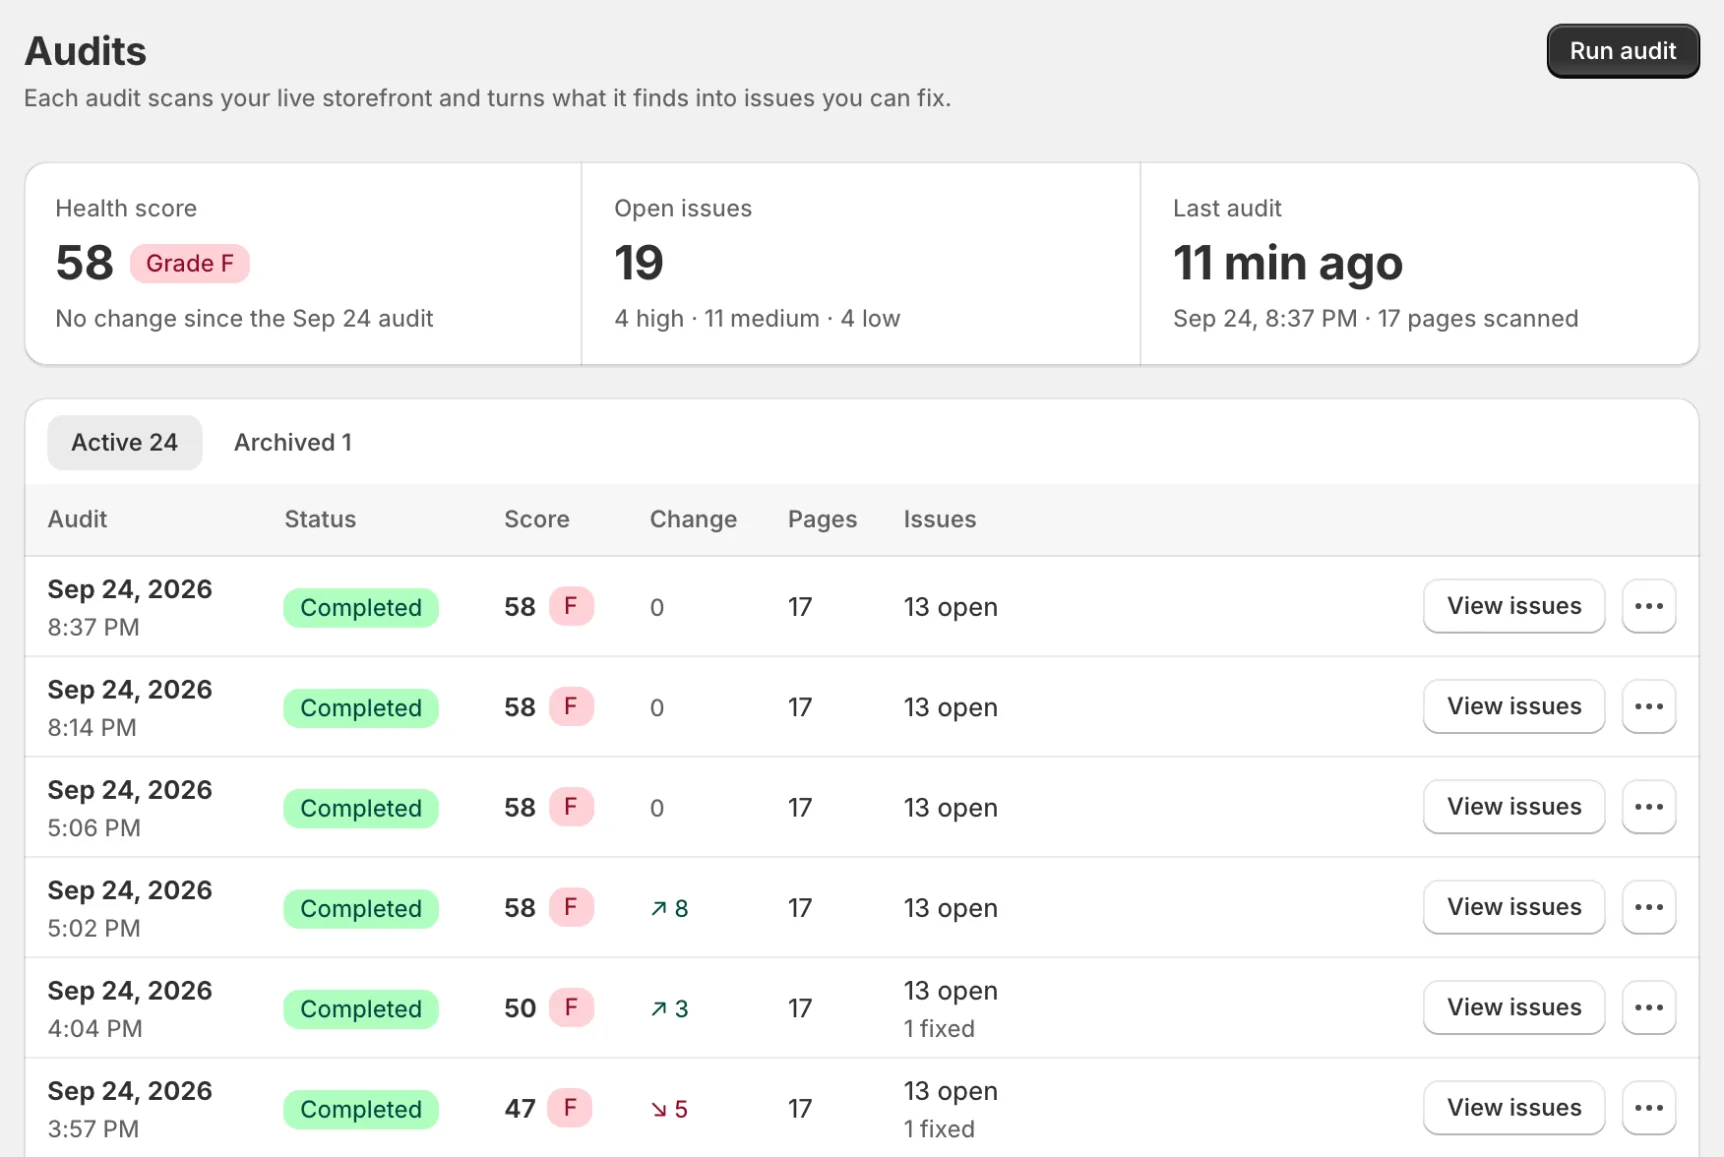
The Audits page: each audit's score and how it changed since the one before.
Guided fixes
Zolvio never edits your theme. Treat Zolvio as the “what to fix” and “how to fix it” layer — you make the change.
Workflow 2: Heatmap → Watch examples → Decide
Heatmaps are best when you can jump from an insight to real examples. Use heatmaps to spot patterns and recordings to validate the “why”.
- Open a heatmap for your highest-traffic page.
- Review Top clicked elements (switch the map to Rage clicks or Dead clicks to see where shoppers got stuck), Scroll depth and, once the page has enough data, the Insights card (dead zones, scroll drop-offs).
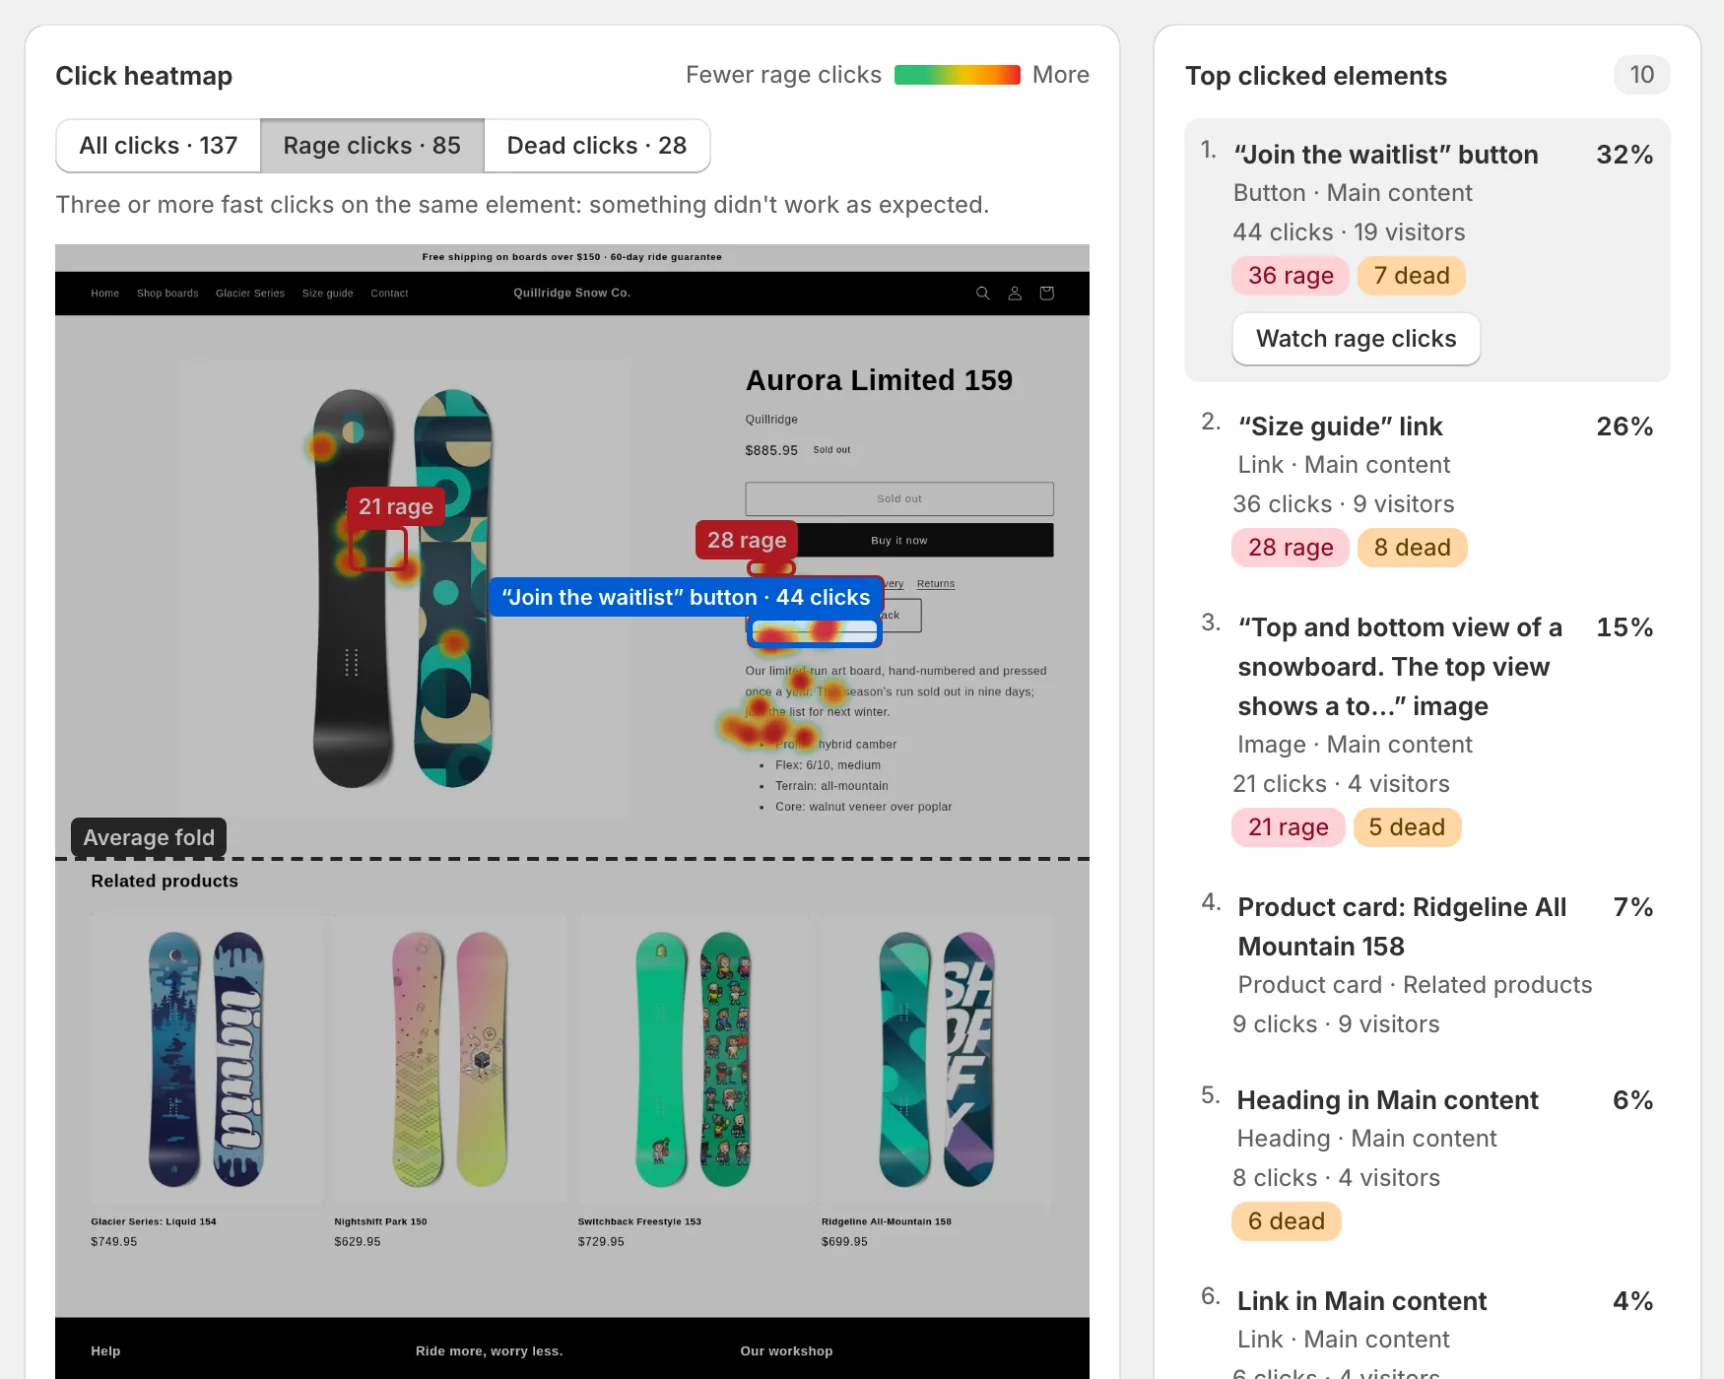
The Rage clicks layer on a sold-out board's page: Join the waitlist is the most-clicked element, with 36 rage clicks. Selecting it outlines it on the map and shows Watch rage clicks. - Select an element and click Watch recordings, or use Watch examples on an insight, to open recordings of the shoppers behind that behavior.
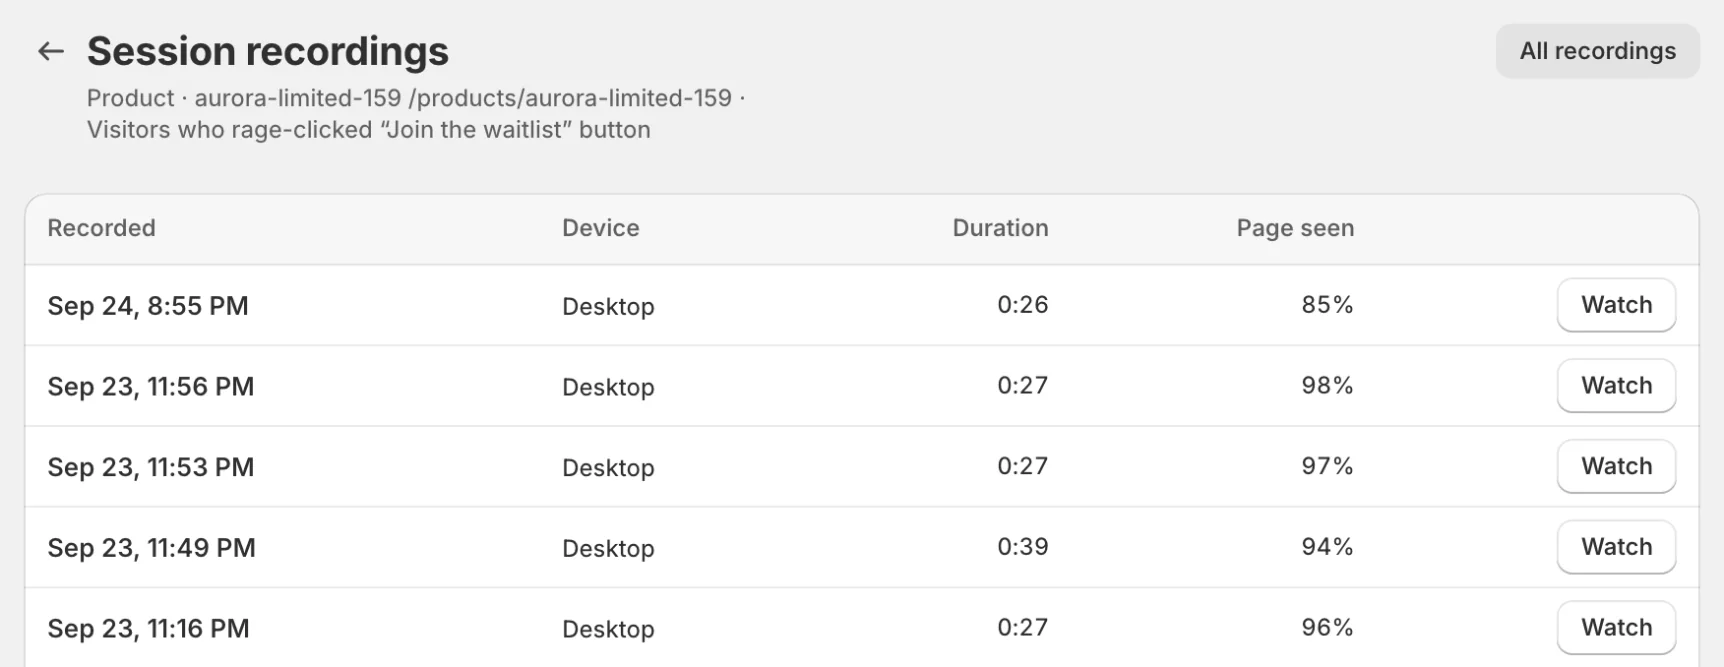
Watch rage clicks opens the recordings of the visitors who rage-clicked that button on this page. 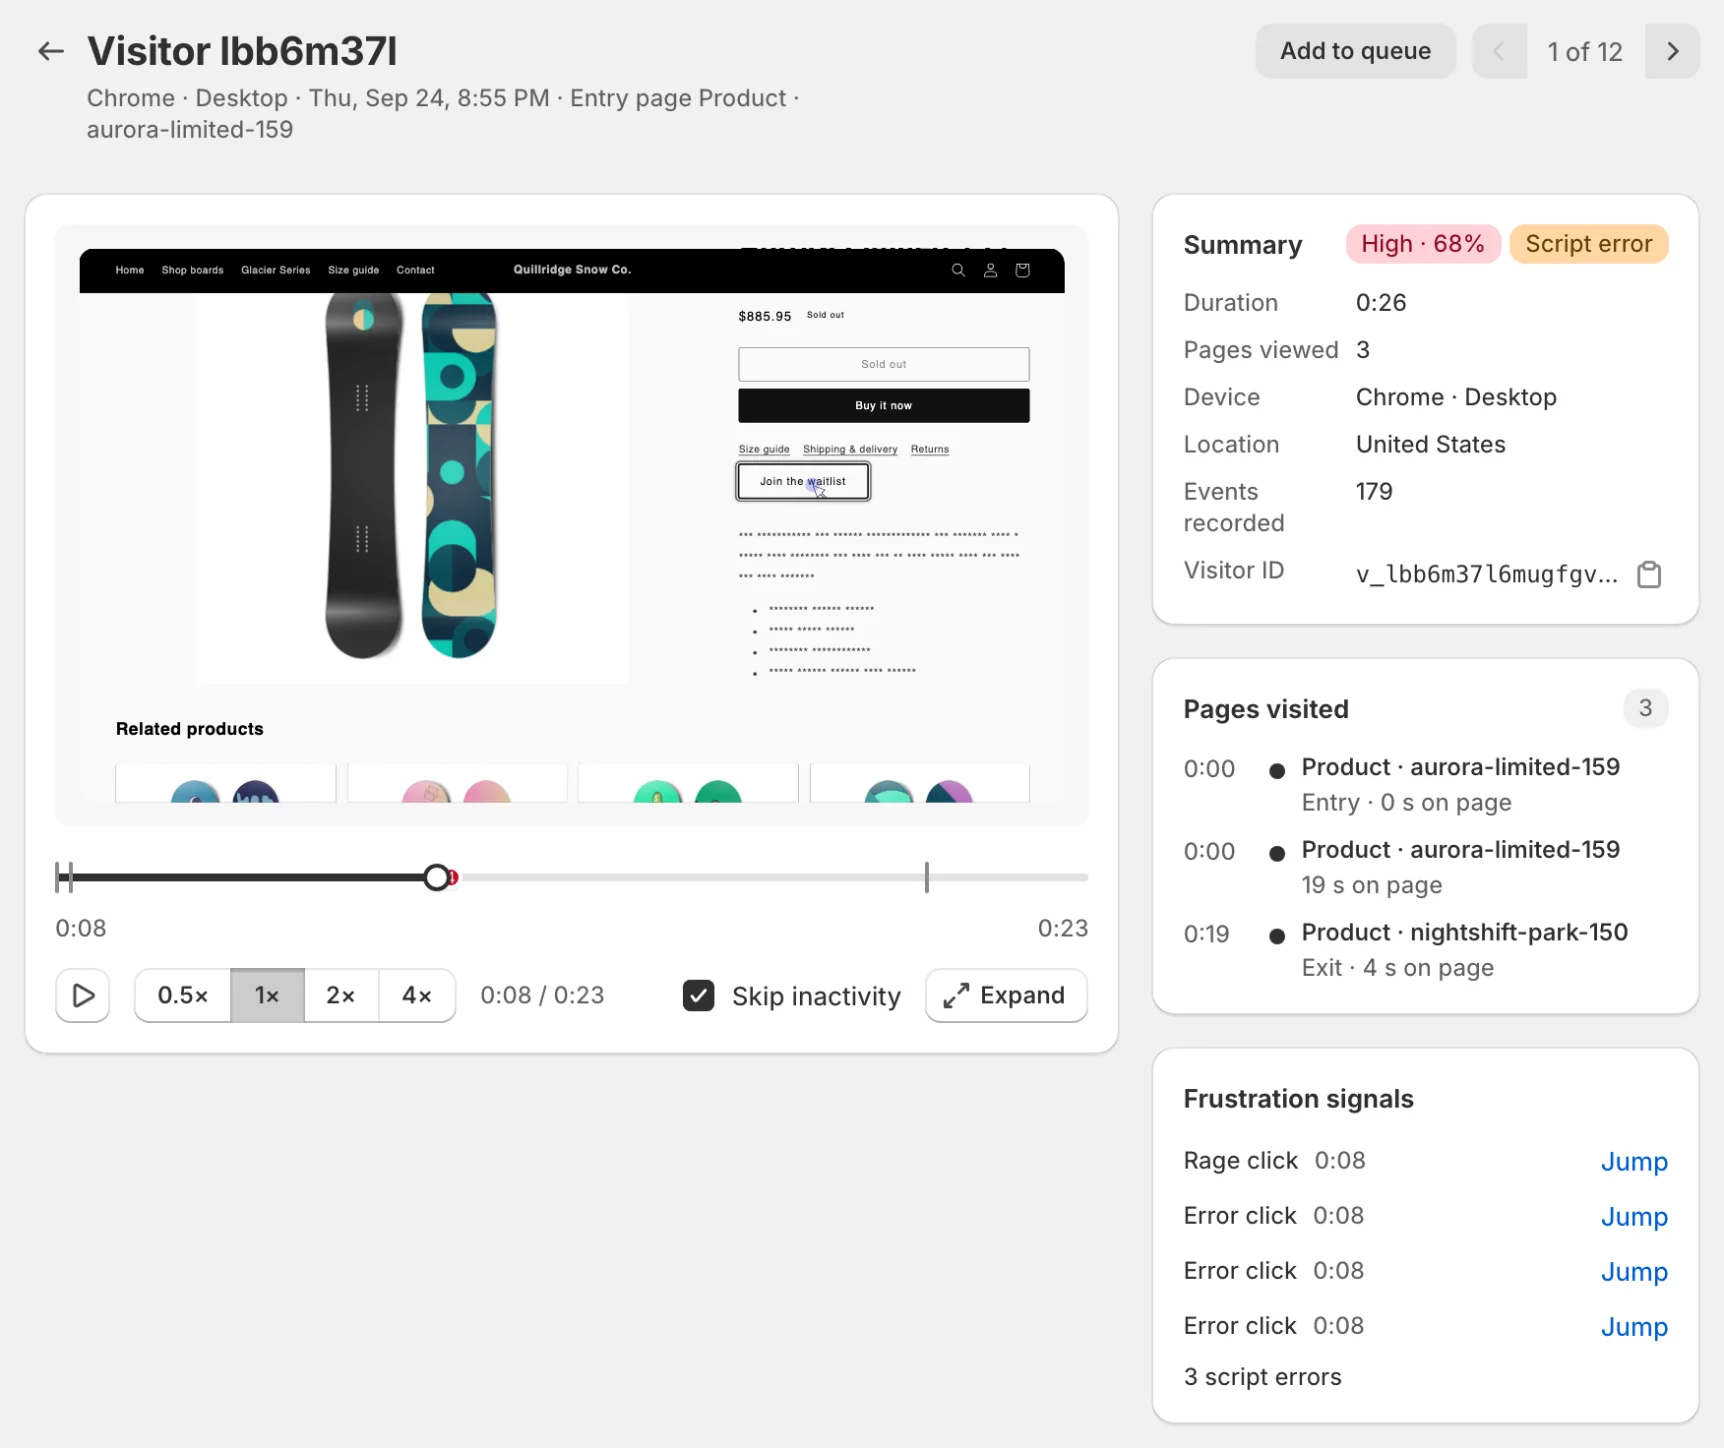
The first recording, at its rage click on Join the waitlist: each click was followed by a script error. - Make the change (layout, CTA clarity, trust signals), or A/B test it first, then keep watching the page.
Workflow 3: A/B test with trust checks
Zolvio’s A/B testing focuses on trust: SRM checks, delivery health, deduping, and QA preview so you don’t ship broken experiments.
- Create a test with the visual editor and clear goal definition.
- Use Preview ▾ on the test page to confirm each variant applies correctly (see QA & Troubleshooting).
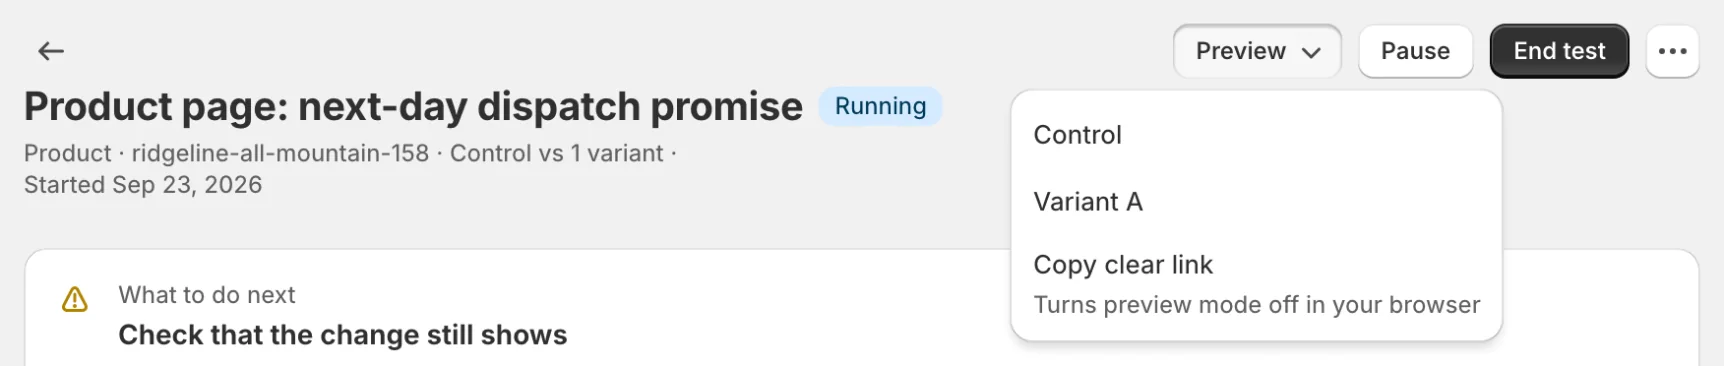
Preview on the test page opens each version on your storefront; preview visits aren't counted. - Read the Checks list (variants showing correctly, enough visitors, no overlap) before trusting results, and follow the What to do next card at the top of the test page.
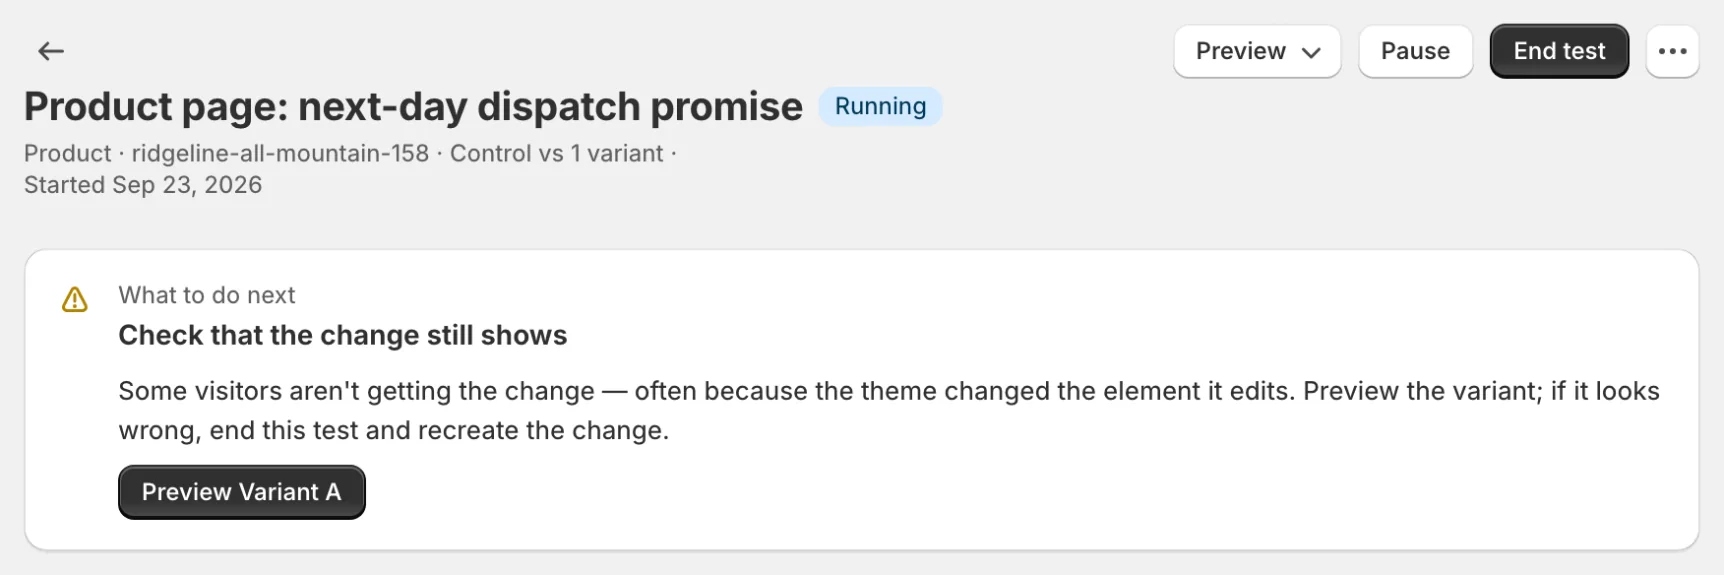
What to do next: one recommendation with the button that carries it out. Here some visitors aren't getting the change. 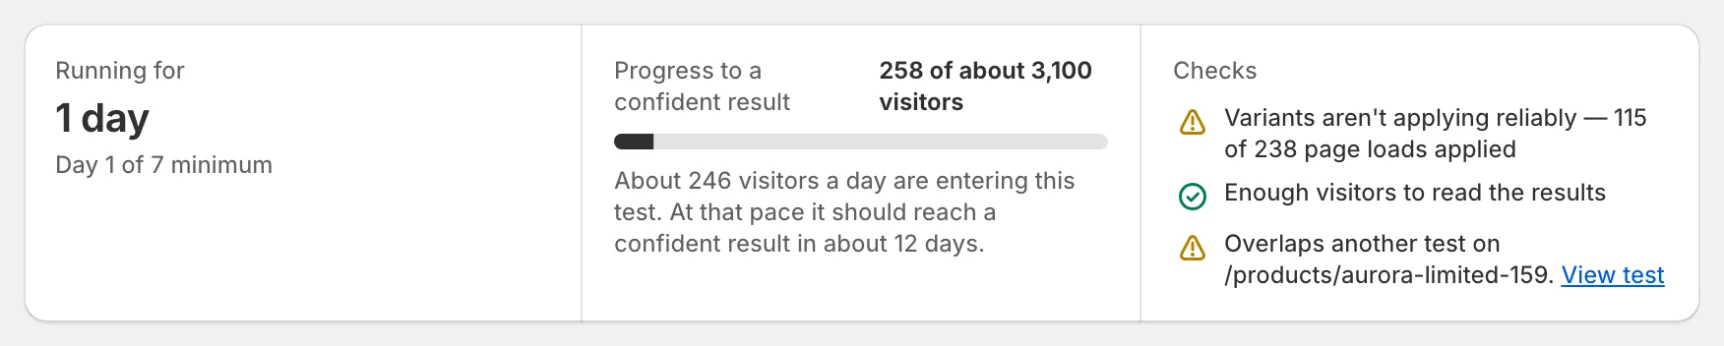
The Checks list says why this result can't be trusted yet: the variant isn't applying reliably and another test overlaps this page. - Use heatmaps + recordings by variant to explain why a variant won (or why it didn’t).
Workflow 4: Surveys → Themes → Fix
Use micro-surveys to capture the “why” behind drop-offs. Cluster open-text answers into themes, then validate those themes with recordings.
- Launch a survey on a targeted page.
- Click Find themes to group open-text answers into themes (paid plans).
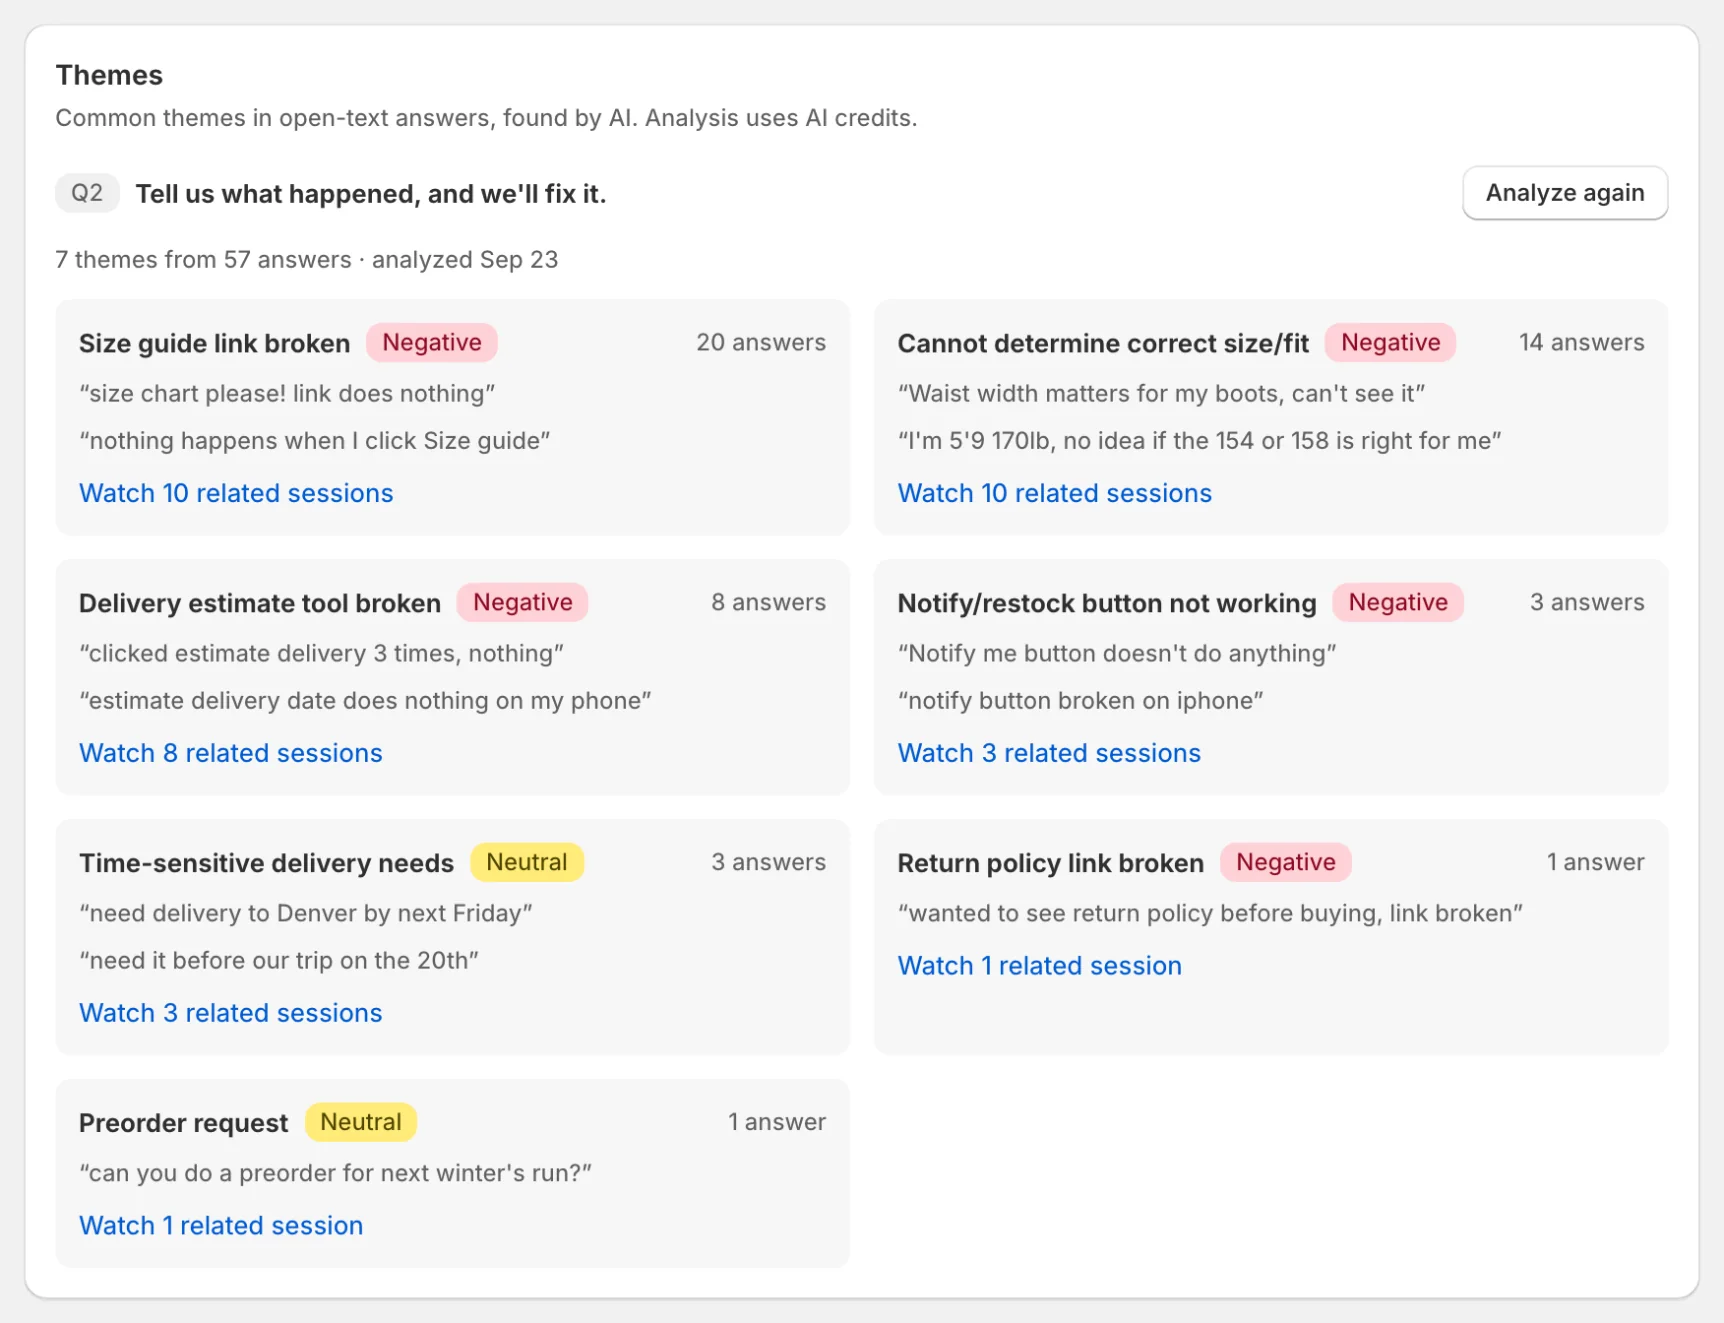
Themes groups open-text answers, each with its sentiment, how many shoppers said it and example quotes. - For negative themes, jump to recordings for sessions linked to those responses.
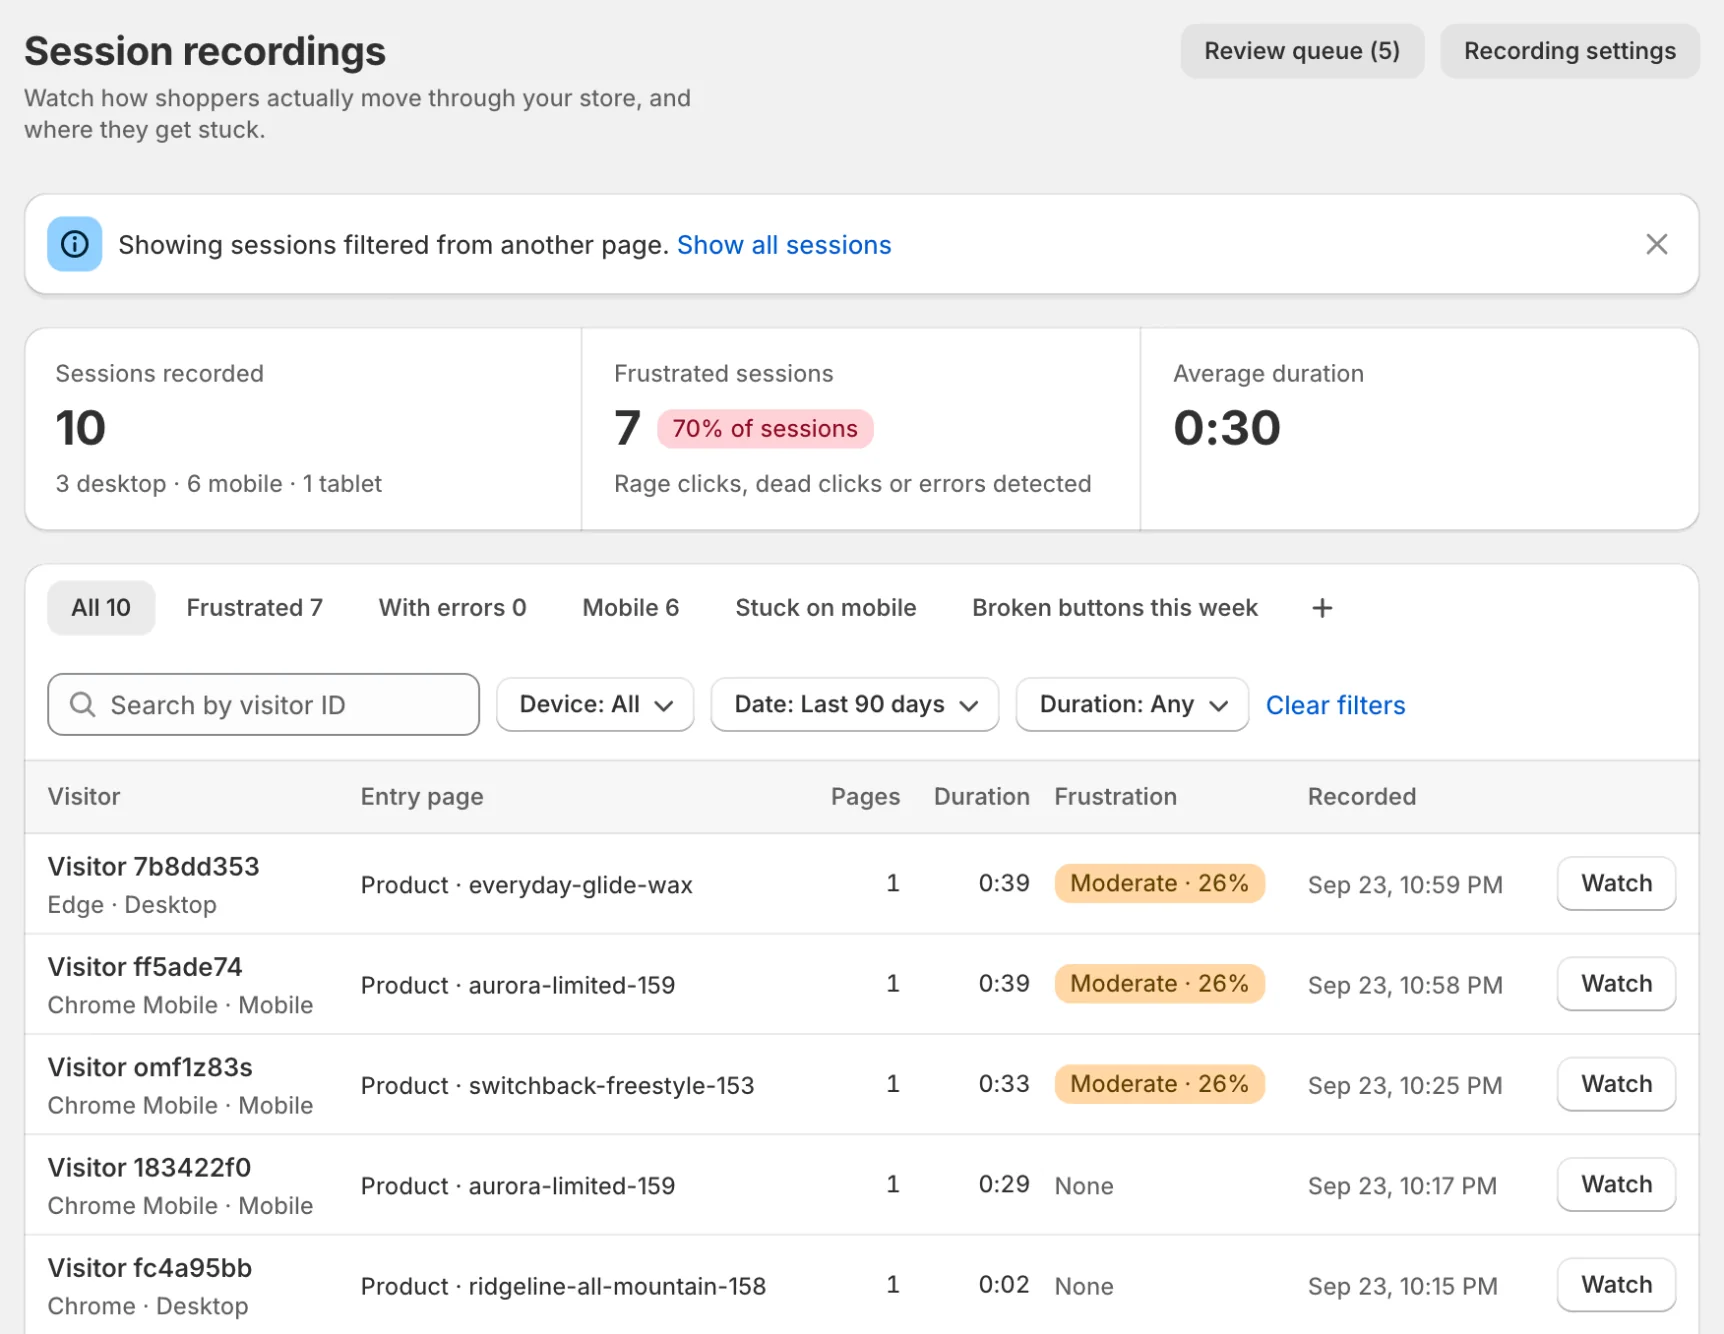
Watch related sessions opens the recordings of the shoppers who gave those answers. - Fix what shoppers keep mentioning, then check whether the theme shows up less often.
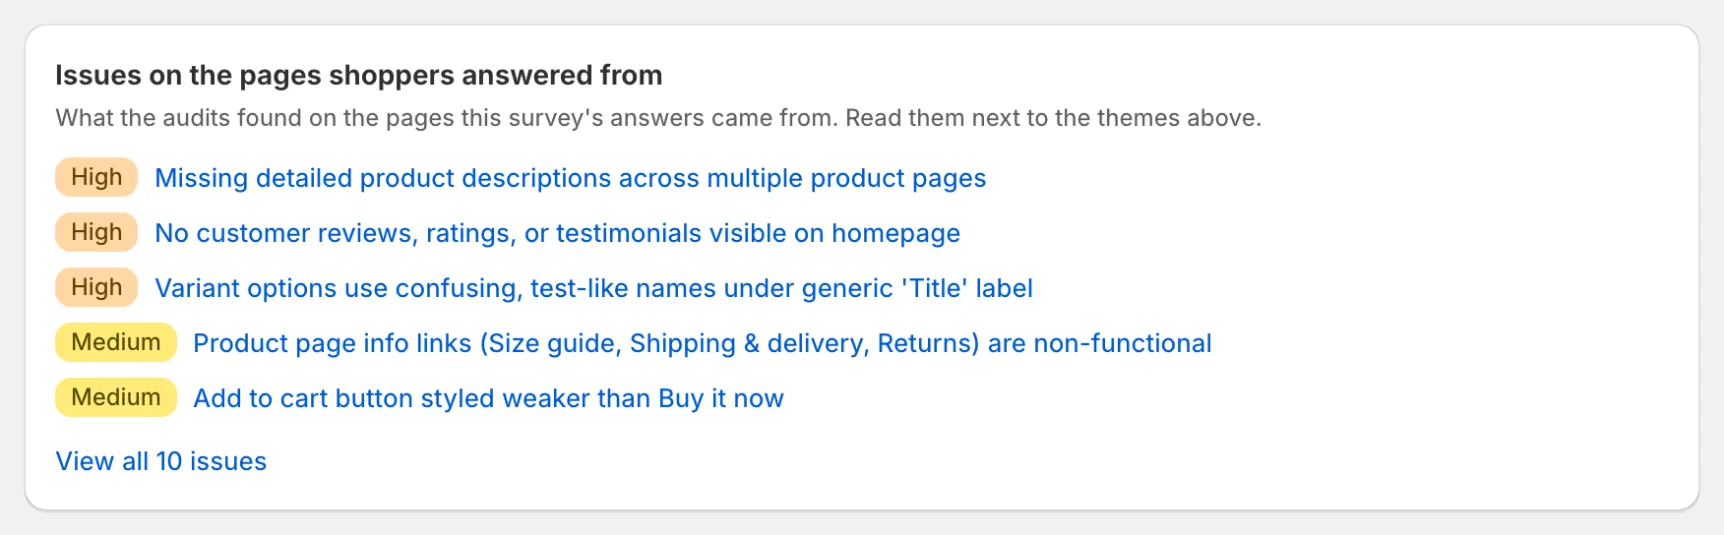
The survey page lists the audit issues on the pages the answers came from, each linking to its issue.